Connecting a Mazak Machine
Direct Machine Connection reads cycle and program data straight from the control over the network, instead of relying only on the current transducer clamped around the spindle phase. Mazak controls running Mazatrol Matrix (and later SMOOTH controls) do this with Fusion Client — Mazak's networking application that runs on the control and pushes machine data out over the network to a monitoring host. In this setup, your TMM Connect device is that monitoring host.
This uses the same TMM Connect device from your installation — there's no extra hardware to fit. You're just pointing the Fusion Client on the control at the TMM Connect device over the network, alongside reading the current clamp.
There are two parts to this:
- Windows networking — give the control a static IP on the same network as the TMM Connect device.
- Fusion Client — add the TMM Connect device as a Monitoring Host so the control pushes data to it.
The screenshots below are from a Mazatrol Matrix Nexus control. Menu names and key positions vary slightly between control generations, but the fields are the same.
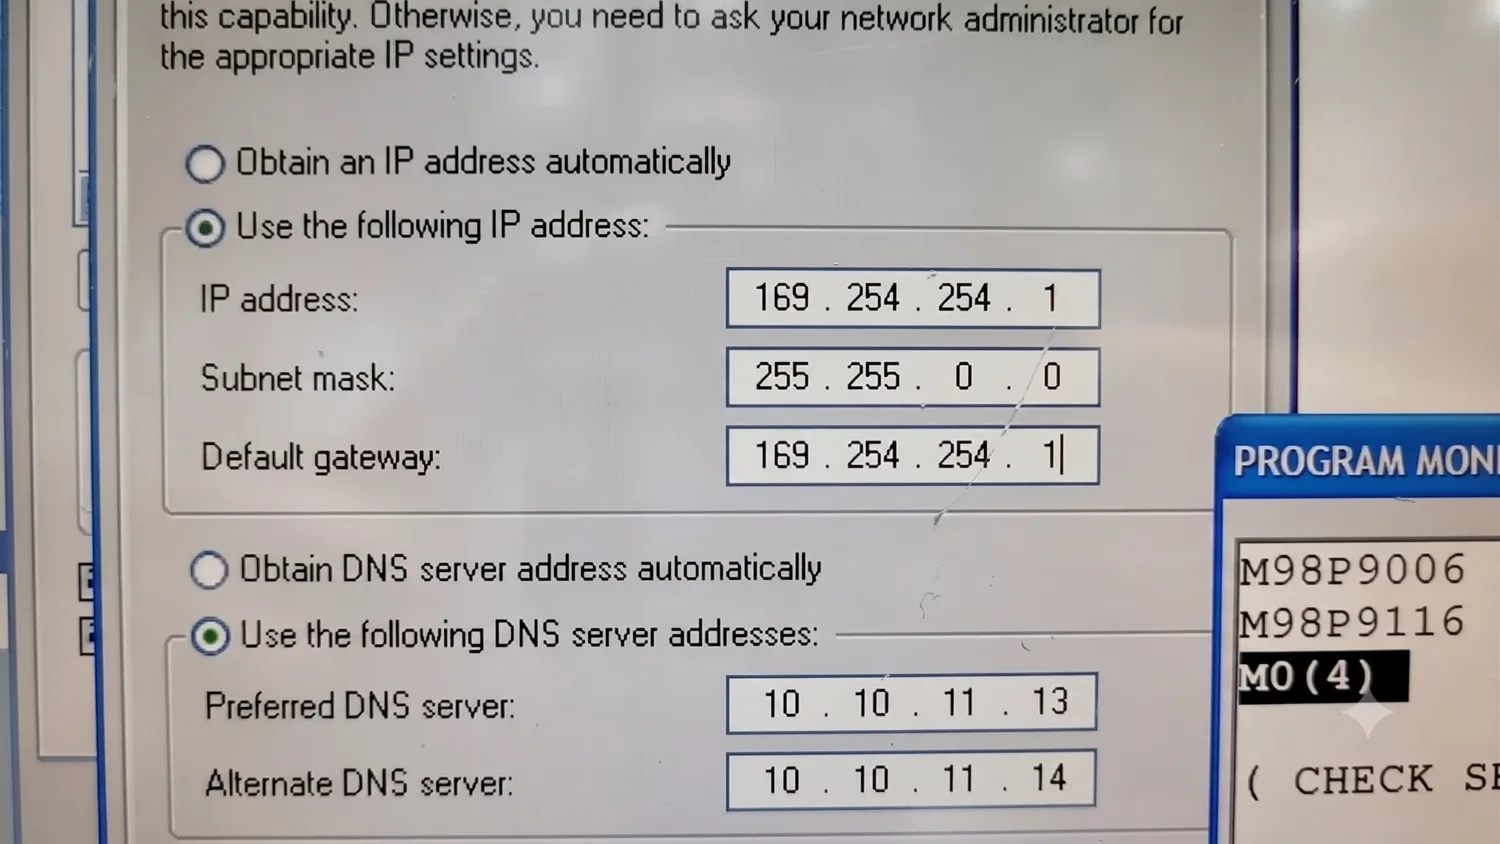
The example screens were captured on a shop network using different addresses.
Enter the values from this guide — where the TMM Connect device is
169.254.254.2 — not the ones pictured.
Before you start
- Your TMM Connect device is already installed and provisioned — see the
Installation Guide if it isn't yet. Note its IP
address; this guide assumes
169.254.254.2. - You can reach the Windows desktop behind the Mazatrol interface (the control runs on Windows). This usually needs a maintenance access level.
- The Fusion Client application is installed. It lives at
C:\CPCU\fmcnc\FusionClient.
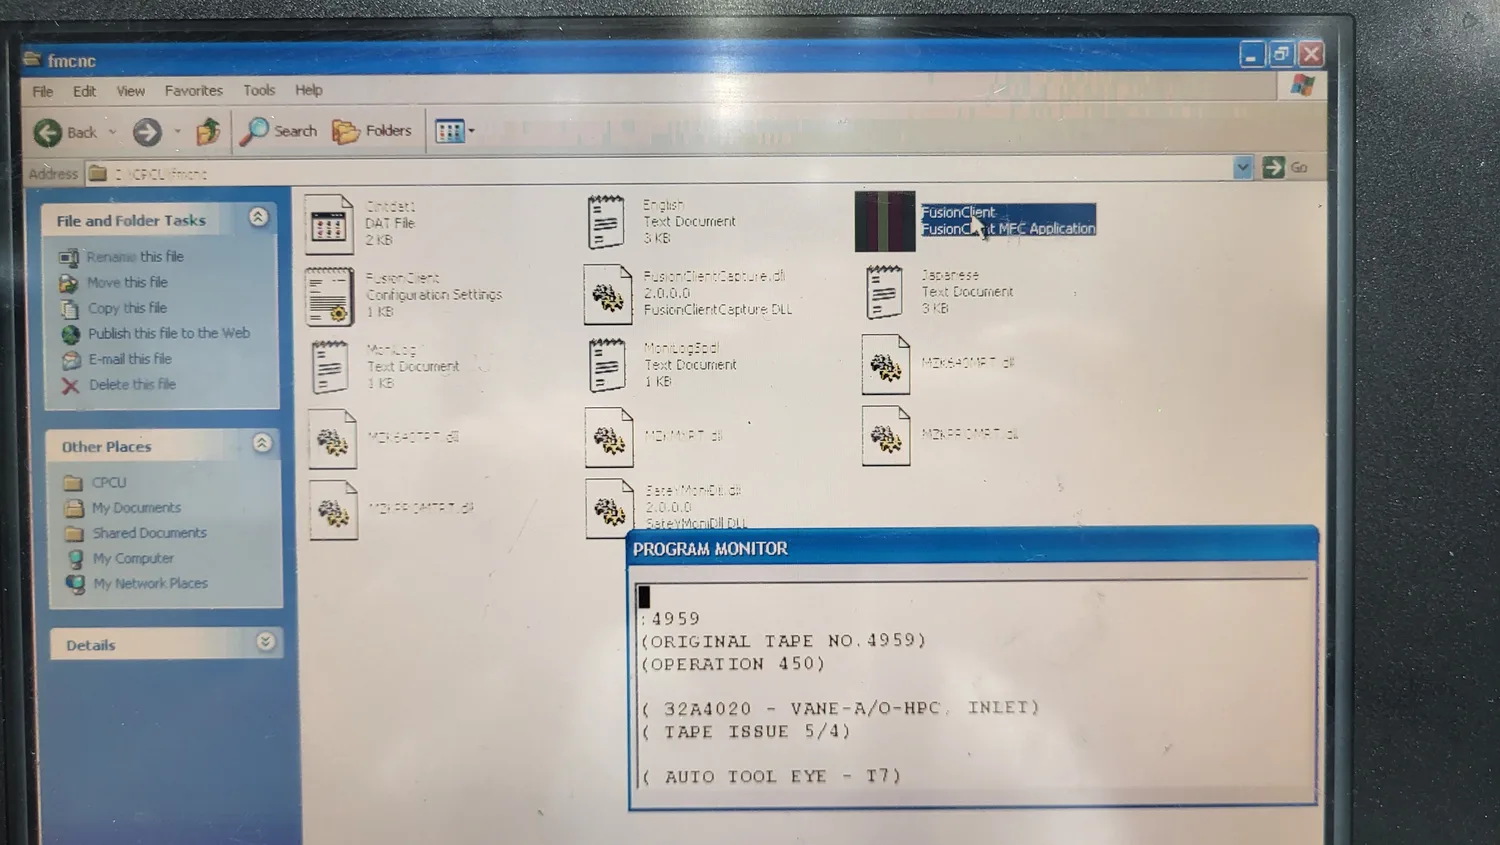
C:\CPCU\fmcnc — the FusionClient application (an MFC Application), alongside its Configuration Settings file.Step 1: Set a static IP on the Windows network adapter
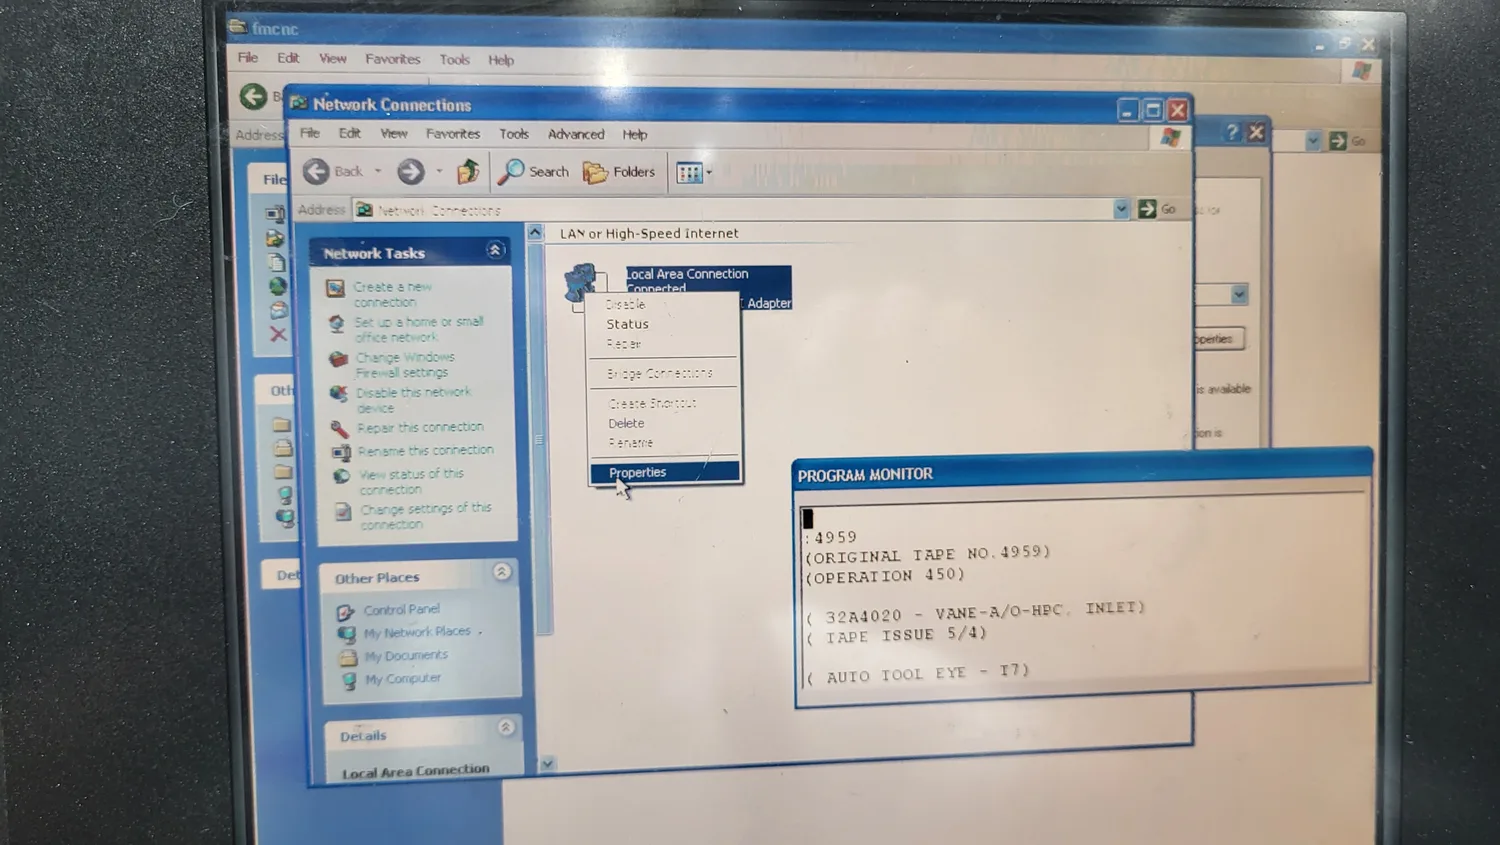
- Open Control Panel → Network Connections.
- Right-click Local Area Connection and choose Properties.
-
Select Internet Protocol (TCP/IP) and click Properties.
-
Choose Use the following IP address and set the control onto the same subnet as the TMM Connect device:
Field Value IP address 169.254.254.1Subnet mask 255.255.0.0Default gateway (leave blank)
- Click OK to close both dialogs.
Give the control an address that isn't already in use on the network. If Windows pops up "There is an IP address conflict with another system on the network," something else already has that address — pick a different one.
Step 2: Add the TMM Connect device as a Monitoring Host
- Launch
C:\CPCU\fmcnc\FusionClientand open the Communications Settings.
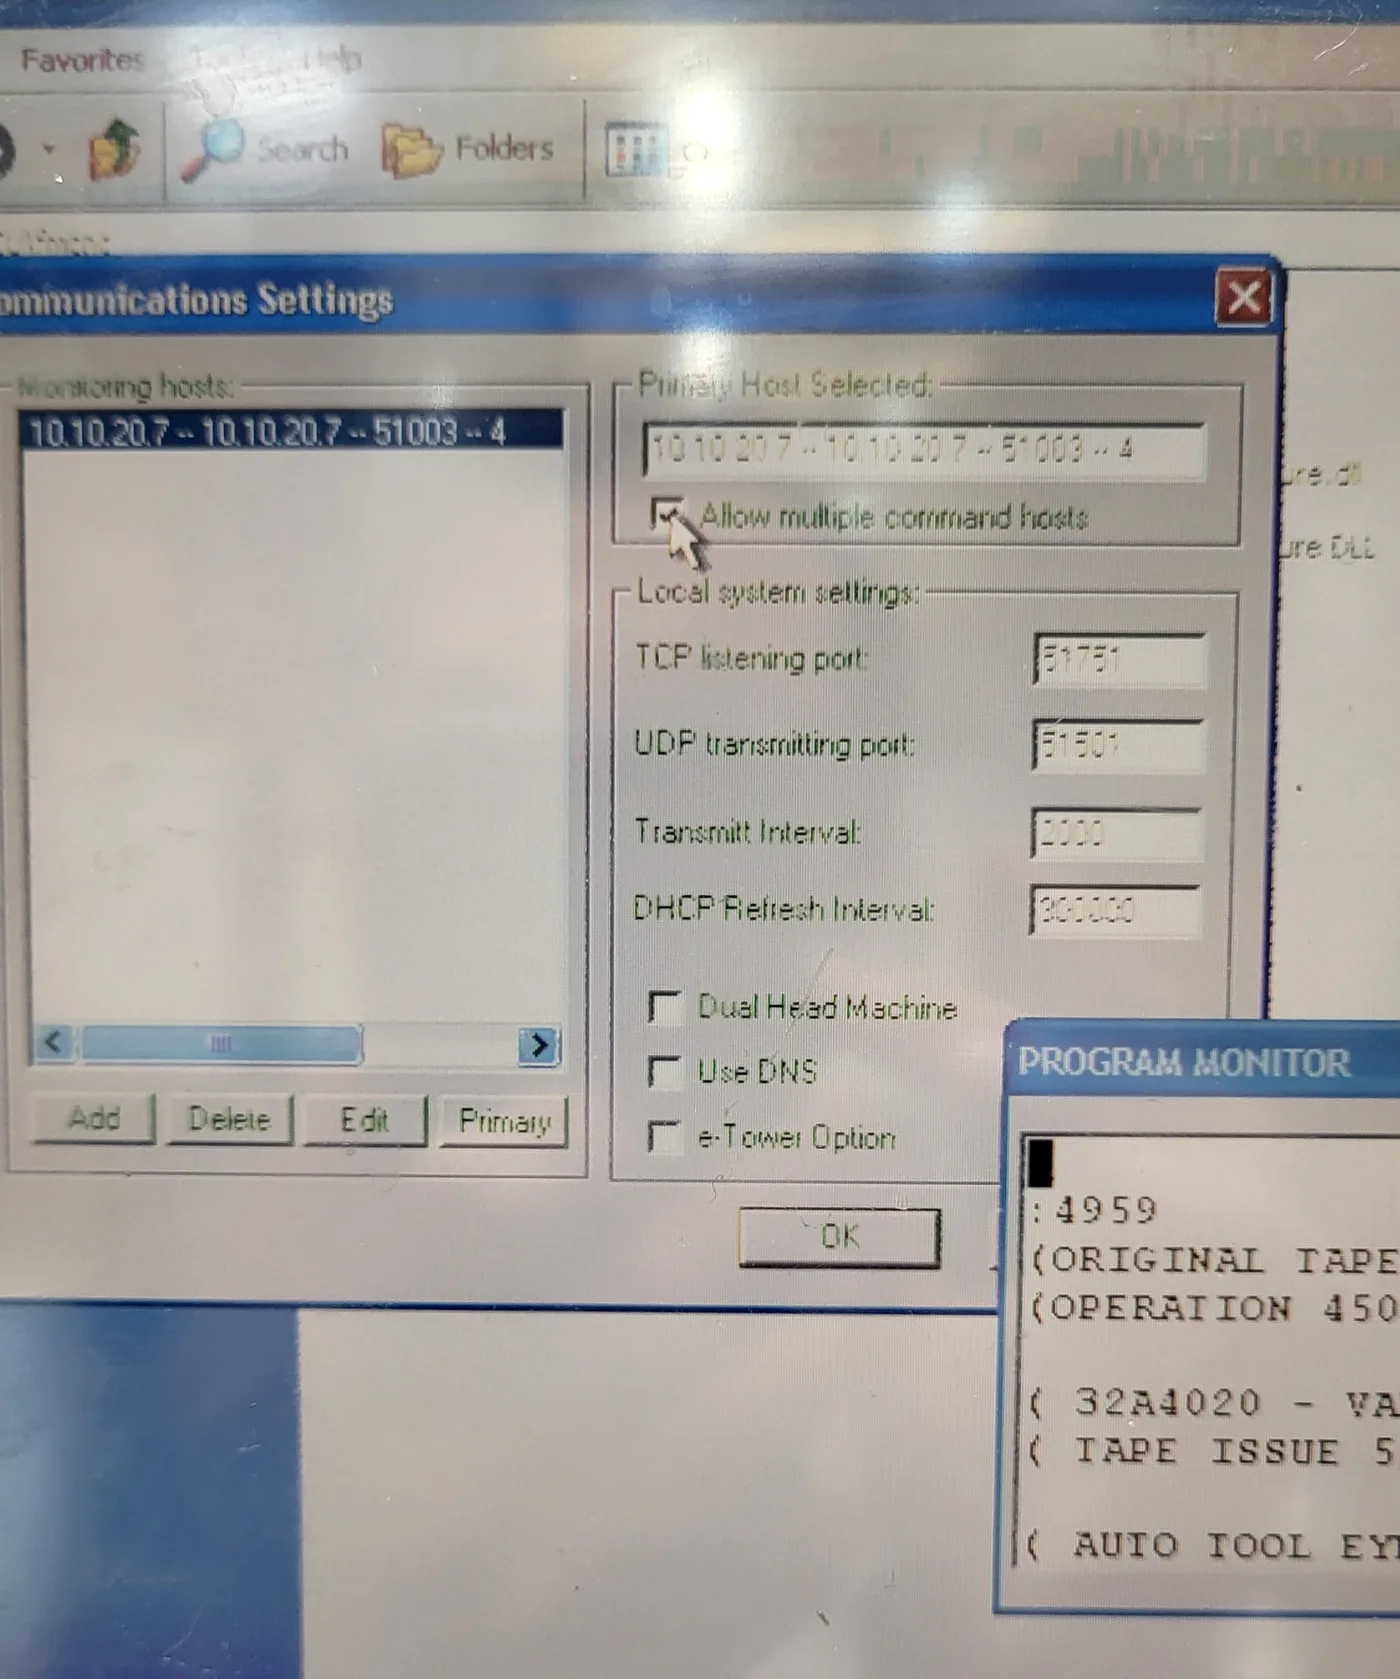
51751, UDP transmitting port 51501) at their defaults.-
Under Monitoring hosts, click Add.
-
In the Add new Monitoring Host dialog, enter:
Field Value Network name of host TMMIP address of Host 169.254.254.2Use DHCP for Host Addressing (unticked) Host UDP Receive Port 51001Host Compatibility A (V1.6.3.1 - V1.6.3.3)
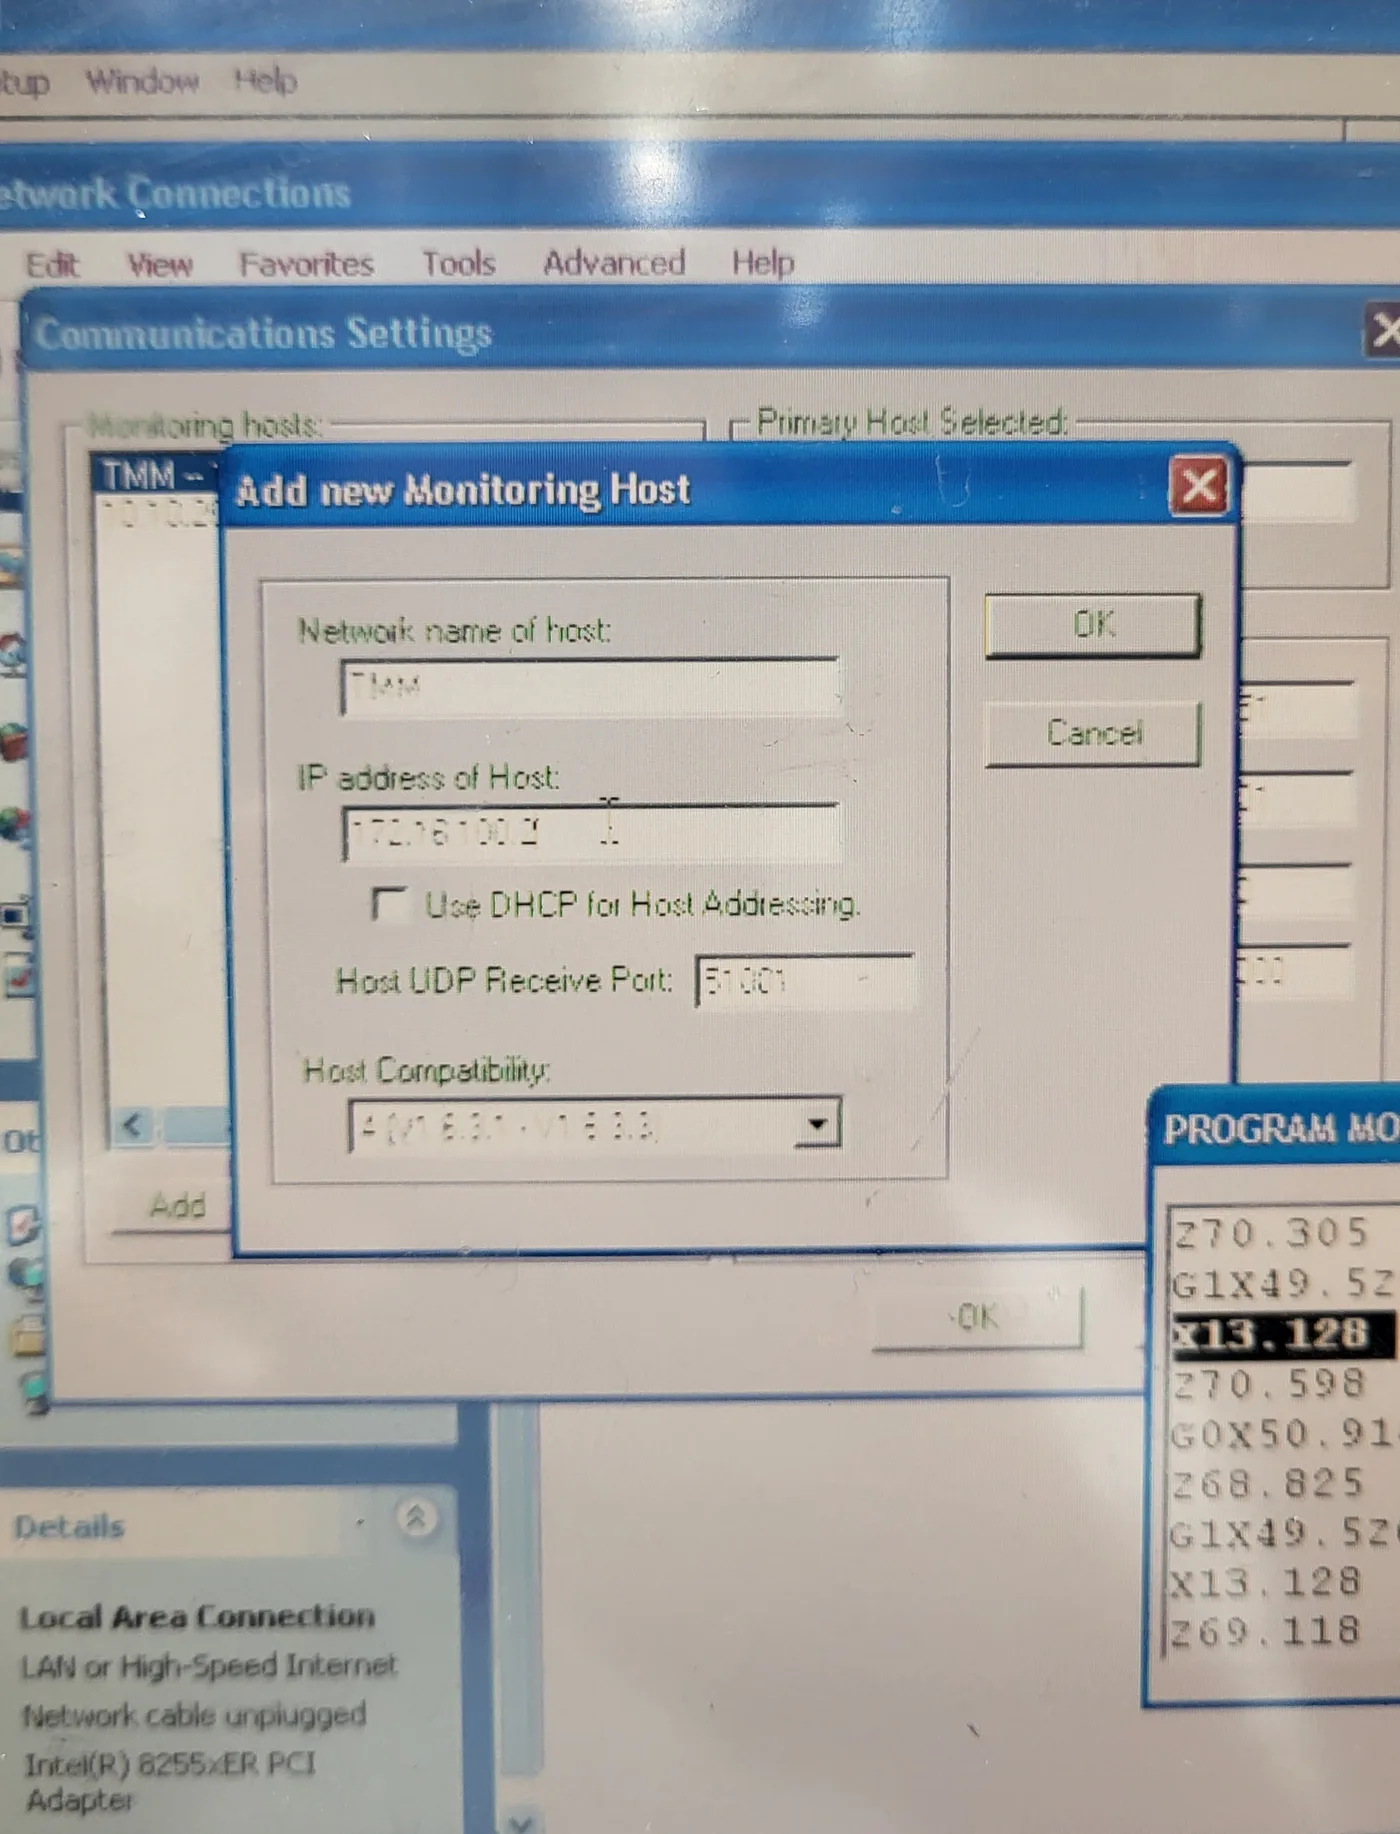
169.254.254.2) and the Host UDP Receive Port to 51001 — the port TMM Connect listens on.- Click OK. The new host appears in the Monitoring hosts list.
- If this is the only monitoring host, select it and click Primary. If the control already reports to another system, tick Allow multiple command hosts so both keep working.
- Click OK to save the Communications Settings.
Step 3: Configure the machine in TrackMyMachines
-
Go to Manage → Machines and open the machine (or create it first — see Adding a machine).
-
Under Advanced Settings, open Machine connection options.
-
Set:
- Direct machine connection type:
Mazak - Machine Port:
51001(must match the Host UDP Receive Port set in Fusion Client) - Machine URL:
169.254.254.1(the control's static IP from Step 1)
- Direct machine connection type:
-
Set the TMM Connect device's own network interface so it sits on the same static link as the control. These fields describe the TMM Connect device, not the Mazak control:
Field Value Static IP 169.254.254.2Subnet Mask 255.255.0.0Default Gateway 169.254.254.2 -
Click Update Machine.
Once saved, the change is pushed out to your TMM Connect device automatically — no need to restart anything on the machine or the device.
Need help?
If cycle data doesn't start appearing after a few minutes:
- Double check the Host UDP Receive Port in Fusion Client (
51001) matches the Machine Port in TrackMyMachines. - Confirm the control and the TMM Connect device are on the same subnet
(
169.254.x.xwith mask255.255.0.0) and that the network cable is plugged in — Fusion Client will happily save a host it can't actually reach. - Make sure nothing between the control and the TMM Connect device (a managed switch, firewall, etc.) is blocking UDP traffic.
Still stuck? Email support@trackmymachines.com.